What you'll need:
Cake Mix (I chose Vanilla)
Everything in the instruction on the cake mix box.
You're favorite Jelly.
Pre-made Icing in any flavor you like
Cupcake tin and cooling rack

Step 1:
Follow the instructions on the cake box to the T. These mixes make things so much easier and faster, especially when you're in a hurry!
Add

Mix

Mmmhmmmm cake batter....
Step 2:
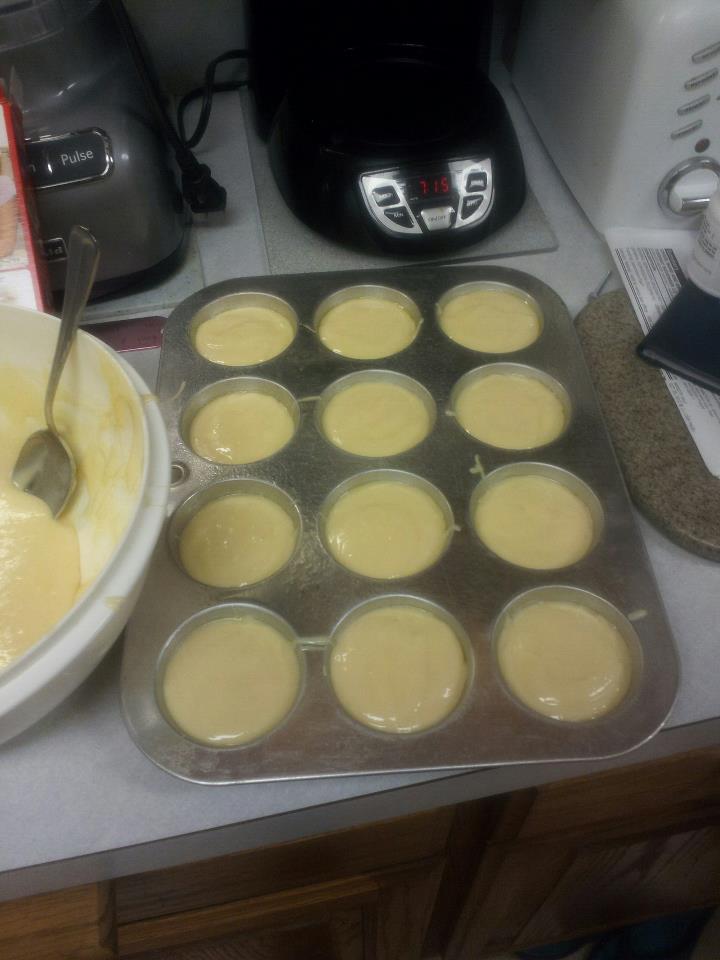
Get your Cupcake tin and grease it up! Pam, Butter, Olive Oil, anything you like to use, use it. Even if it claims to be a nonstick pan, use it anyways because they can still get stuck. Or you can avoid the whole spray drama and use cupcake liners! (Just make sure you pick a cool color!)

Pour the batter into each segment. Only fill it about half way so your cupcakes don't overflow and bake themselves together.
Step 3:
Bake according to the directions. I usually set my timer for a little less then the box dictates to make sure my oven doesn't burn my treats. (Just like my poor brownies when I was younger...)
Use the toothpick test on them to make sure they're cooked all the way. I like the test the ones in the middle and the corners. Just poke the toothpick in and if it pulls out clean the cupcakes are done!
Step 4:
After the cupcakes are done take them out of the tin and let them cool on a rack. While theyre cooling we'll prep our frosting and jam!
Step 5: The Frosting
If you bought frosting thats ok, you dont always have to make it from scratch. I bought vanilla for this little venture. Take about half of the frosting out of the container and mix it around to loosen it up and make it easier to work with.
At this point I added coconut extract to my frosting and mixed it in to make it extra yummy!
Step 6: Jelly Filling
Take a jar of your favorite jelly ( I chose Guava) and spoon out about 6 or 7 spoonfuls into a small microwave safe dish.
Then stick the bowl in the microwave for 10 seconds.
When its done take it out a stir it up, if its still really thick put it in for a little longer. 5 second increments work best for me when doing this.
You don't want it to be totally liquidy otherwise it will just seep out the bottoms of your cupcakes.
Step 7:
The cupcakes should have cooled down to the touch so now its time to fill them. I don't have those fancy pastry bags and filling nozzles so I take a small sharp knife and cut out the center of the cupcakes.
Don't cut all the way to the bottom of the cupcake though or we'll get that seeping I mentioned in the last step. I usually cut about halfway into the cupcake then set the cut out part right next to the dissected cupcake.
The cupcakes are ready for filling now! So take your jelly spoon and pour into the dissected cupcakes. Add as much or as little as you like then 'put the cap' back on the cupcake. You might need to remove some of the cap to make it fit.

Step 8:
Frost them babies! Its ok if they aren't pretty, they'll still taste good. Plus you can always add sprinkles or other candies to make them prettier if your frosting job comes out as horribly as mine!

Then eat! Whether you choose to share or not these cupcakes are fun, easy, and have hundreds of varieties! If you can imagine it, you can definitely make it with these. There are just so many options with the cake mixes and fillings you can choose from!
Happy Baking!
-May
No comments:
Post a Comment